Rubrik Dynamic Day2Operation with vRealize Automation

In my previous blog we created a dynamic populated drop-down list with all available Rubrik SLA domain names. This drop-down list was used in a standard vRA IaaS request form when requesting a new virtual machine.

After doing some testing at my customers environment, we discovered that our current approach for facilitating backups with Rubrik through vRealize Automation was not efficient enough.

This was caused by the behavior of how Rubrik can include a virtual machine into backup. Before a newly deployed virtual machine is available for assigning a SLA domain name, it needs to be recognized by Rubrik. To be recognized by Rubrik, we needed to force a Rubrik discovery of vCenter objects after every virtual machine deployment with vRealize Automation.

This resulted in long virtual machine deployment times because every  deployment needed to wait on a task for Rubrik discovery of vCenter objects. To make it even worse, multiple tasks for Rubrik discovery of vCenter objects get queued when more virtual machines are requested frequently or simultaneously. Eventually this resulted in failed virtual machine deployments because the vRO actions used in the Rubrik vRO workflows are receiving a time-out.

However, out-of-the-box, a Rubrik discovery of vCenter objects task is triggered a couple of times per hour. With the knowledge that you can assign a default SLA domain on vCenter objects (vCenter Server, vCenter Cluster or vCenter ESXi Host), we decided to change our backup strategy.

We are now assigning a default SLA domain name on the vCenter Cluster level, so every requested virtual machine with vRA will be automatically in backup. Instead of asking the SLA domain name on the the vRA request form, we are now offering a vRA Day2Operation to dynamically change the Rubrik SLA domain name. This blog reveals how we configured this vRA Day2Operation.

  1. First we created a copy/duplicate of the Rubrik vRO workflow “Rubrik Assign VM to SLA Domain”. Name this new workflow “Rubrik Change SLA Domain”.
  2. Edit the “Rubrik Change SLA Domain” workflow. Go to the presentation tab and add a property of the type “predefined answers” to the input parameter “slaDomainName”.
  3. Assign the action “rubrikGetAllSLA” (The one we created in my previous blog post) as a value to this new property.
  4. Save the new workflow and it is ready to be used as a Day2Operation in vRealize Automation.
  5. Now create a resource action in vRA based on the newly created vRO workflow “Rubrik Change SLA Domain”.
  6. Next, publish the resource action and assign it to your entitlement.
  7. When you now select your provisioned virtual machines under Items in vRA, you will see your newly created Day2Operation “Rubrik Change SLA Domain”.
  8. Now lets test the new available vRA Day2Operation. After you select it, it will ask you for the new Rubrik SLA domain name. Make you choice, change the Rubrik SLA domain name of your virtual machine and click Submit.
  9. Thats’s it! You now have changed the Rubrik SLA domain name of your virtual machine. Enjoy consuming Rubrik through vRA.

All available Rubrik SLA domain names dynamically populated in standard vRA IaaS Request Forms

Anyone familiar with Rubrik? Rubrik Cloud Data Management delivers automated backup, instant recovery, offsite replication, and data archival in a simple, scale out platform built for hybrid cloud. For more information go to https://www.rubrik.com/product/overview/

My current customer is using Rubrik as a backup solution for their vSphere managed virtual machines. They are also using vRealize Automation 7.x as their preferred private cloud solution.

With vRA 7 they automated the deployment of their Windows and Linux virtual servers. As part of their deployment process, they needed an automated integration with Rubrik. They asked me to dynamically populate a drop-down list on a vRA 7 request form with all available SLA domain names from their Rubrik environment. These SLA domain names must be based on actual “live” information. One of the good things about Rubrik, is that it ships with a REST API.  This blog reveals how I full-filled my customer use case.

  1. To start the integration with Rubrik into vRealize Automation, I downloaded the latest version of vRealize Orchestrator package for Rubrik. This package is compatible for Rubrik v3.0 API calls. You can download this package from the following location: https://github.com/rubrikinc/vRO-Workflow/releases/tag/3.0.0
  2. Now import this vRO package into your vRO environment. It contains the following workflows and actions, a configuration element and a rubrik logo.
  3. To configure the Rubrik integration into vRealize Orchestrator, you have to run the vRO workflow “Rubrik Add Cluster Instance”. This will add a the Rubrik appliance as a REST Host to the vRO Inventory section and will also store the required Rubrik information in a vRO configuration element.
  4. To address my customer requirements, I needed to create a vRO action that combined a couple of the Rubrik library actions including a slightly modified Rubrik library action. On top of this I needed to remove any input requirements for these vRO actions to simplify the integration into vRealize Automation. The populated vRO configuration element with all the required Rubrik information was very helpful for this challenge.
  5. I created a copy of the Rubrik Library action “rubrikGetSLAID” and named it “rubrikGetAllSLA”. Inside the “rubrikGetAllSLA” action, I stored the values of the required Rubrik configuration element attributes into local variables to feed the inputs of the called out Rubrik Library actions “rubrikGetToken” and “base64Encode_1”. As a result of this, I was able to run the modified Rubrik Library action “rubrikGetSLAID” which returns an array of strings containing the available Rubrik SLA domain names.
  6. The contents of the vRO action “rubrikGetAllSLA” is shown below.
  7. The result of the vRO action “rubrikGetAllSLA” is shown below.
  8. To dynamically populate a drop-down list in a vRA 7 standard IaaS request form with all available Rubrik SLA domain names, I needed to create a custom property with the name “Vm.RubrikSLADomain” on the standard IaaS blueprints for the Windows and Linux deployments. Secondly I needed to create a vRA property definition based on an external value, which is in fact the vRO action that I created before. Below is my example of this vRA property definition.
  9. Finally, when I request a new virtual machine with vRealize Automation 7.x, it looks like the screenshot below. (The below example is based on a deployment for a Linux virtual machine).
  10. Enjoy using vRA, vRO and Rubrik 😉

How to consume the vRO 7.x API with Oauth2.0 Authentication

Most of us know that vRO has a REST API and that every request to this Orchestrator REST API must be authorized by an authenticated user.
Depending on whether you configure Orchestrator with LDAP,vCenter Single Sign-On or Oauth2.0, the authentication scheme for the Orchestrator REST API is different.

The most commonly way to consume the Orchestrator REST API, is based on LDAP Authentication. The downside of this approach is, that you must apply the Basic HTTP authentication scheme on the vRO virtual appliance or on the vRA virtual appliance when using the embedded vRO instance.

To apply the Basic HTTP authentication scheme, you need to add the following property to vmo.properties configuration file:

com.vmware.o11n.sso.basic-authentication.enabled = true

The vRO API documentation can be found on:

HOWEVER, if Orchestrator is configured with vIDM you can use an oauth bearer access token to access system objects in Orchestrator through the REST API. This also removes the requirement to apply the Basic HTTP authentication scheme. vIDM Authentication is THE recommended authentication mechanism when using vRO 7.x together with vRA 7.x !

This blogpost reveals how to consume the vRO 7.x REST API with Oauth2.0 Authentication!

  1. First you need to lookup the client id. You can do this by logging into the vRA virtual appliance with your favorite SSH client.  The <CLIENT_ID> can be found in /etc/vcac/solution-users.properties. For this request to work you will need the cafe_cli client. The following script should print it in the console. (grep -i cafe_cli= /etc/vcac/solution-users.properties | sed -e ‘s/cafe_cli=//’)
  2. Secondly write down the following prerequisites <vRA VA>, <TENANT>, <USERNAME> and <PASSWORD>. Please note that the <USERNAME> must be entered the same way it is entered on the login page. The <DOMAIN> is the fully qualified name of the domain of the user. You can find it by searching for the user in ‘Administration -> Users & Groups -> Directory Users and Groups’.
  3. Now you have gathered all the prerequisites, you can request the bearer token with the following REST API call.

  4. Finally we can use our bearer token to consume the vRO REST API ! See below for an example when using the external vRO virtual appliance.

  5. Have fun with the vRO REST API 😉

How to use a dynamic populated drop-down list with vRA 7 default IaaS blueprints

With vRA 7, the functionality of the default IaaS blueprints are dramatically improved. One of the new cool features is the usage of dropdown lists populated by a vRealize Orchestrator action. This is something we have only seen before in ASD/XaaS blueprints.

This blog article describes how to use this new cool feature.

In my example I am going to create a drop-down list which query’s a specific vCenter folder for existing vSphere templates and returns them in the drop-down list on the request form.

  1. Create your IaaS Blueprint and drag one vsphere virtual machine on the design canvas.IaaS-blueprint-1
  2. Select the vsphere virtual machine now and you will see the General tab of it’s configuration.IaaS-blueprint-2
  3. Click on the Build Information tab and specify your vsphere template as below example. I have chosen for template name TMPL-CENTOS-VRAS because selecting a template is required in this type of blueprint. Even when it is not my intention to use this template at all.IaaS-blueprint-3
  4. Click on the Properties tab and next click on the Custom Properties sub tab. Add a new custom property with the name cloneFrom and make sure you have enabled the check box Show in Request. Otherwise you will not see this custom property on the request form.IaaS-blueprint-4
  5. You are now done with the IaaS blueprint so click Finish.
  6. Next make your blueprint available as a catalog item in your service catalog. (publish your blueprint, assign a service for this new catalog item and make sure it is part of your end users entitlement.)
  7. When you request your catalog item now, it will look like the below screenshot.Request-IaaS-blueprint-1
  8. Now it’s time to create your vRO action. So lets open your vRO client, navigate to the action section, select a folder (for where to store your action in),  click on create a new action, give it a name (in my example the name is displayTemplatesFromFolderId) and click Ok.create-vro-action-1
  9. Go to the Scripting tab of your new vRO action.                                            1. Set your Return type to Array/string                                                              2. Create two attributes. Name one attribute sdkConnection and name the other attribute vcFolderId                                                                                     3. Make sure the new attributes are of the type string                                    4. Provide the following JavaScript code:

    5. Click Save and closecreate-vro-action-2
  10. Make a note of your values for sdkConnection (fqdn of your vCenter Server) and vcFolderId (the vCenter folder group-id). In my example, I can find this information in the vRO Inventory section.action-inputsMy value for sdkConnection = pb0vcsa01.flexlab.local                              My value for vcFolderId = group-v279
  11. Now lets create a new vRA Property Definitioncreate-vra-property-definition
  12. Follow the detailed steps below                                                               1. Name your Property Definition cloneFrom (This is exactly the name as you used for your custom property configured on the IaaS blueprint)        2. For Label type Select Template                                                                       3. For Data type select String                                                                               4. For Required select Yes                                                                                     5. For Display advice select Dropdowncreate-vra-property-definition-2
  13. Instead of selecting Predefined values in the Value section, select External values.external-values
  14. A new window will open where you have to select your newly created vRO action. When selected click Ok.select-script-action
  15. Next populate the values for the Input parameters which have been captured in step 6 and finally click Ok.create-vra-property-definition-3
  16. When you now request your catalog item it will look like the below screenshot.Request-IaaS-blueprint-2
  17. Enjoy using vRA 7 !

How to find the vRO workflow used for your XaaS Service Blueprint in vRA 7

With vRA 7 we can create XaaS Service Blueprints. These type of blueprints can be used for almost any request you can think about. But what if you need to modify or update this type of service blueprint, how can you find the correct vRO workflow which has been used for this service blueprint ?

This blog article explains how to find it.

      1. Make sure you have a working vRA 7 environment where you have published a XaaS Service Blueprint to your Service Catalog. In this example I am using the XaaS Service Blueprint “Create logical switch“. Now lets find the belonging vRO workflow.service-catalog-with-xaas-service-bleuprint
      2. Start your vRO client and navigate to the Inventory Tab. Next unfold your Xaas Service Blueprints, they are located in the folder:                     vRealize Automation –> <your vrealize virtual appliance> –> Administration –> XaaS Service Blueprints                                            Select the corresponding XaaS Service Blueprint (In my example “Create logical switch“) and make a note of the workflowId (see screenshot).get-workflow-id-xaas-service-blueprint
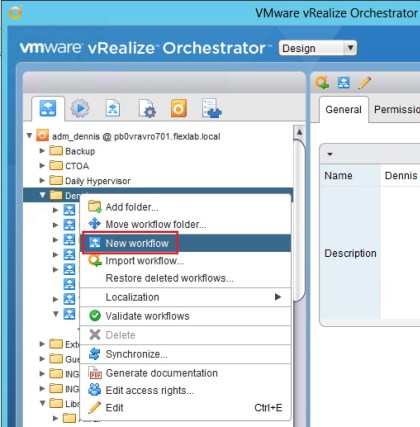
      3. Now lets create a new simple vRO workflow. In my case the name is “Find my Workflow by ID“.create-new-workflowworkflow-namegeneral-tab
      4. Go to the Inputs tab and create a new parameter with the Name workflowId and the Type string.inputs
      5. Go to the Ouputs tab and create a new parameter with the Name workflowLocation and the Type Workflow. Create a second new parameter with the Name workflowName and the Type string.outputs
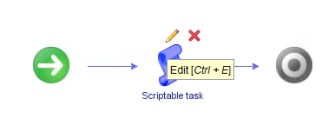
      6. Go to the Schema tab and drag a Scriptable task into your workflow schema.new schemanew schema - add scriptable task
      7. Select the Scriptable task and click on yellow pencil for edit. Next give it a logical name like Find my Workflow.edit-scriptable-taskedit-scriptable-task-info-tab
      8. Go to the IN tab and click on the create new binding button.bind-to-workflow-parameter
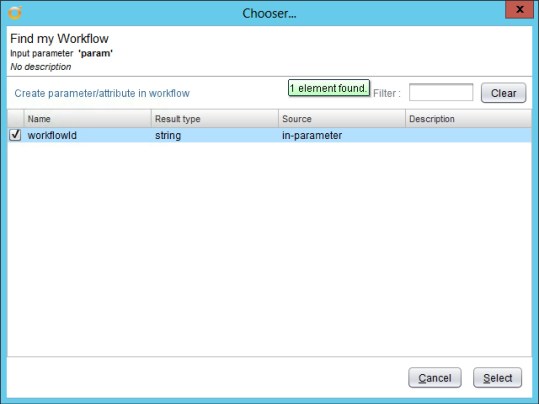
      9. Mark the checkbox workflowId and click Select.input-parameter-scriptable-taskinput-parameter-scriptable-task
      10. Go to the OUT tab and click on the create new binding button. Mark the checkboxes workflowLocation and workflowName and click Select.output-parameter-scriptable-taskoutput-parameter-scriptable-task-done
      11. Now go to the Scripting tab and type the following JavaScript code:        var workflowLocation = Server.getWorkflowWithId(workflowId);
        var workflowName = workflowLocation.name;javascript-code
      12. If you did everything properly the IN and OUT attributes will change to the color purple in your JavaScript code (as displayed in above screenshot).
      13. The Visual Binding tab will look like the screenshot below. You can now click on Close.visual-bindings
      14. Now Click on Validate to check your workflow for errors. When everything is OK, you will see the message “Workflow is valid!“. Close the validation window and click Save and close.validate
      15. Click Continue anyway if you don’t want to change the workflow version number. This is the first version of your workflow so this will be fine.add to version history
      16. Start your new workflow now and lets see if we can find our XaaS Service Blueprint “Create logical switch“.start-my-new-workflow
      17. Please enter the workflowId you have found in step 2 and click Submit.submit-my-new-workflow
      18. If your workflow can find the workflowId you provided, it will succeed successfully. Like the below screenshot.workflow execution token
      19. Now go to the Variables tab and click on the info button of the workflowLocation Value. In here it will reveal the name and the location of your vRO workflow used for your XaaS Service Blueprint “Create logical switch“.workflow-foundworkflow-view-location